

Hello dear readers! today I will be sharing with you a very simple DIY tutorial on how to reupholster chairs! (I apologize for the quality of these pictures, they were taken very hastily with my cell phone) Before you begin you will need:
- Chair(s) with removable seats
- Fabric (enough to cover each seat with about 2-3 inches extra on all four sides)
- A staple gun and extra staples (I got mine at Joann's for about $15)
- Screwdriver
- Scissors
- A friend!
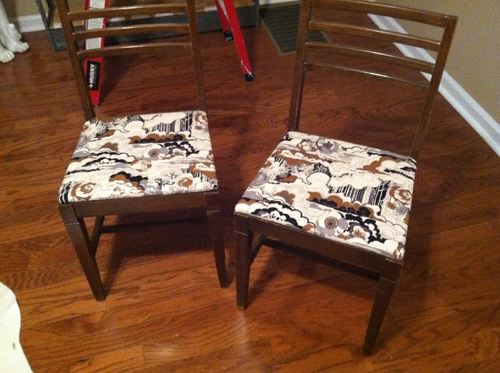
The first step is to take the seats off of the chairs. I got my dining room table and chairs at the Nashville Flea Market a few months ago. And I liked the fabric that was on them originally, but it was very worn out and stained. This was the original fabric that was on the 4 chairs when we started.


This is about what your chairs should look like when the seats are removed. You can do these one at a time, or all at once. It just depends on your preference. The next thing you need to do is cut out your fabric.

Lay the seat down on one corner of your fabric, then measure and cut all the way around leaving a 2-3 inch border on all four sides. Again, you can either cut these all at once, or do them one at a time. If the fabric you are covering is darker than your new fabric, you may want to put a layer of cotton or batting under your new fabric.

Next its time for the staple gun! You may want to have a friend help you with this part, as it is a little difficult to hold the fabric down tightly, and staple by yourself.

Place the seat face down in the direct center of your fabric square. Make sure the fabric is also face down and in the direction you want to be in when its flipped over. Using two hands fold once side of the fabric over the seat, making sure not to pull the opposite side out from under the seat.

Have a friend staple all the way across the bottom side of the seat while you hold the fabric taught. Make sure that you are putting a staple at least every two inches to make sure that the fabric will stay in place when it is finished.

Turn the seat around and pull the opposite side of the fabric tight. You want to work on the opposite side from the one you just stapled so that the fabric will be secure when you are finished. If you move counter or clockwise there is a chance you fabric could tilt or shift in the process.

Once you have finished the opposite side its now time start on the corners. Its important to do the corners next because you want the fabric to be tight and there is a chance it will shift if you start in the middle. Fold one corner in diagonally, much like wrapping the side of a present in gift wrap. Put a few staples in the crease to make sure it will hold. Do the same thing to the other corner.

Next you will need to make anther diagonal fold over the one you just did. This will take care of any bunching on the face side of your seat. Repeat this secondary fold one the other corner. Once you have finished with the corners you can then work on the middles. Pull your fabric tight again and staple down the remaining sides.

When you are finished, the bottom of your seat should look something akin to this. It does not have to look pretty, no one is going to see the bottom. If you have extra fabric hanging down and what to trim that, you can. This may also aid in screwing the seats back onto the chair frame if you have covered up any of the screw holes.

Once you are done, replace the seats back on the chair frames and screw them back in. Flip them over and admire your work! Here is a final picture of how our chairs turned out! The four chair took us less than an hour to complete, and it was very easy to do!
Have you done any reupholstering lately? Or did this tutorial inspire you to do some of your own? Please let us know, leave your comments, successes, tips, mishaps and pictures in the comments below!
No comments:
Post a Comment